

This tutorial shows how to retrieve, verify, and store user credentials using Firebase Authentication, the App Engine standard environment, and Cloud Datastore.
This document walks you through a simple note-taking application called Firenotes that stores users' notes in their own personal notebooks. Notebooks are stored per user, and identified by each user's unique Firebase Authentication ID. The application has the following components:
The frontend configures the sign-in user interface and retrieves the Firebase Authentication ID. It also handles authentication state changes and lets users see their notes.
FirebaseUI is an open-source, drop-in solution that handles user login, linking multiple providers to one account, recovering passwords, and more. It implements authentication best practices for a smooth and secure sign-in experience.
The backend verifies the user's authentication state and returns user profile information as well as the user's notes.
The application stores user credentials in Cloud Datastore by using the NDB client library, but you can store the credentials in a database of your choice.
The following diagram shows how the frontend and backend communicate with each other and how user credentials travel from Firebase to the database.
Firenotes is based on the Flask web application framework. The sample app uses Flask because of its simplicity and ease of use, but the concepts and technologies explored are applicable regardless of which framework you use.
Objectives
By completing this tutorial, you'll accomplish the following:
- Configure the Firebase Authentication user inferface.
- Obtain a Firebase ID token and verify it using server-side authentication.
- Store user credentials and associated data in Cloud Datastore.
- Query a database using the NDB client library.
- Deploy an app to App Engine.
Costs
This tutorial uses billable components of Google Cloud Platform (GCP), including:
- Cloud Datastore
Use the Pricing Calculator to generate a cost estimate based on your projected usage. New GCP users might be eligible for a free trial.
Before you begin
- Install Git, Python 2.7, and virtualenv. For more information on setting up your Python development environment, such as installing the latest version of Python, refer to Setting Up a Python Development Environment for GCP.
-
Sign in to your Google Account.
If you don't already have one, sign up for a new account.
-
Select or create a GCP project.
- Install and initialize the Cloud SDK.
If you have already installed and initialized the SDK to a different project,
set the gcloud project to the App Engine project ID you're using
for Firenotes. See Managing Cloud SDK Configurations for
specific commands to update a project with the gcloud tool.
Cloning the sample app
To download the sample to your local machine:
Clone the sample application repository to your local machine:
git clone https://github.com/GoogleCloudPlatform/python-docs-samples.git
Alternatively, you can download the sample as a zip file and extract it.
Navigate to the directory that contains the sample code:
To configure FirebaseUI and enable identity providers:cd python-docs-samples/appengine/standard/firebase/firenotesAdd Firebase to your app by following these steps:
- Create a Firebase project in the Firebase console.
- If you don't have an existing Firebase project, click Add project and enter either an existing Google Cloud Platform project name or a new project name.
- If you have an existing Firebase project that you'd like to use, select that project from the console.
- From the project overview page, click Add Firebase to your web app. If your project already has an app, select Add App from the project overview page.
Use the
Initialize Firebasesection of your project's customized code snippet to fill out the following section of thefrontend/main.jsfile:
- Create a Firebase project in the Firebase console.
Edit the
backend/app.yamlfile and enter your Firebase project ID in the environment variables:In the
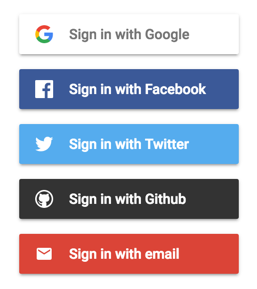
frontend/main.jsfile, configure the FirebaseUI login widget by selecting which providers you want to offer your users.Enable the providers you have chosen to keep in the Firebase console by clicking Authentication > Sign-in method. Then, under Sign-in providers, hover the cursor over a provider and click the pencil icon.
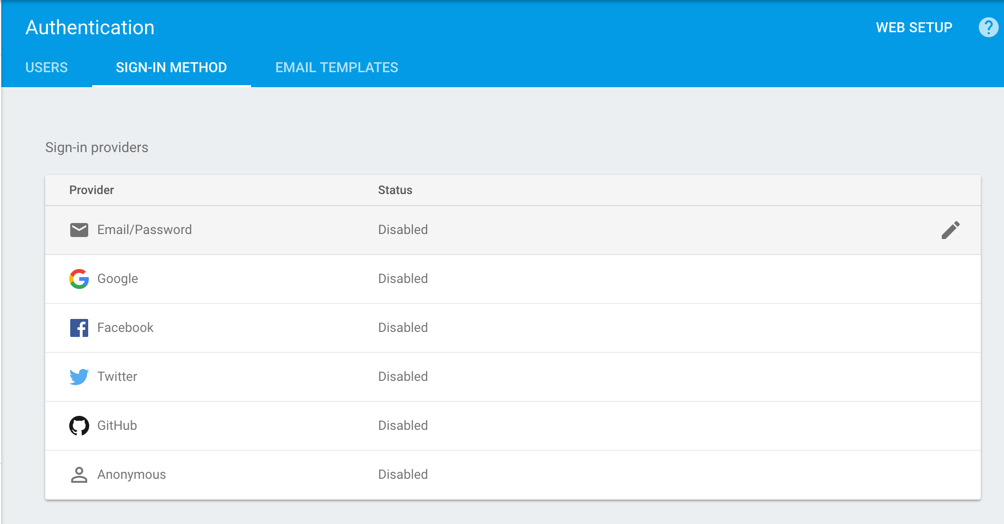
Toggle the Enable button and, for third-party identity providers, enter the provider ID and secret from the provider's developer site. The Firebase docs give specific instructions in the "Before you begin" sections of the Facebook, Twitter, and GitHub guides. After enabling a provider, click Save.

In the Firebase console, under Authorized Domains, click Add Domain and enter the domain of your app on App Engine in the following format:
[PROJECT_ID].appspot.comDo not include
http://before the domain name.
Installing dependencies
Navigate to the
backenddirectory and complete the application setup:cd backend/Install the dependencies into a
libdirectory in your project:pip install -t lib -r requirements.txtIn
appengine_config.py, thevendor.add()method registers the libraries in thelibdirectory.
Running the application locally
To run the application locally, use the App Engine local development server:
Add the following URL as the
backendHostURLinmain.js:http://localhost:8081Navigate to the root directory of the application. Then, start the development server:
dev_appserver.py frontend/app.yaml backend/app.yamlVisit http://localhost:8080/ in a web browser.
Authenticating users on the server
Now that you have set up a project and initialized an application for development, you can walk through the code to understand how to retrieve and verify Firebase ID tokens on the server.
Getting an ID token from Firebase
The first step in server-side authentication is retrieving an access token to
verify. Authentication requests are handled with the onAuthStateChanged()
listener from Firebase:
When a user is signed in, the Firebase getToken() method in the
callback returns a Firebase ID token in the form of a JSON Web
Token (JWT).
Verifying tokens on the server
After a user signs in, the frontend service fetches any existing notes in the
user's notebook through an AJAX GET request. This requires authorization to
access the user's data, so the JWT is sent in the Authorization header of the
request using the Bearer schema:
Before the client can access server data, your server must verify the token is
signed by Firebase. You can verify this token using the
Google Authentication Library for Python.
Use the authentication library's
verify_firebase_token
function to verify the bearer token and extract the claims:
Each identity provider sends a different set of claims, but each has at least a
sub claim with a unique user ID and a claim that provides some profile
information, such as name or email, that you can use to personalize the user
experience on your app.
Managing user data in Cloud Datastore
After authenticating a user, you need to store their data for it to persist after a signed-in session has ended. The following sections explain how to store a note as a Cloud Datastore entity and segregate entities by user ID.
Creating entities to store user data
You can create an entity in Cloud Datastore by declaring an
NDB model class with
certain properties such as integers or strings. Cloud Datastore indexes
entities by kind; in the case of Firenotes, the kind of each entity is Note.
For querying purposes, each Note is stored with a key name, which is the
user ID obtained from the sub claim in the previous section.
The following code demonstrates how to set properties of an entity, both with the constructor method for the model class when the entity is created and through assignment of individual properties after creation:
To write the newly created Note to Cloud Datastore, call the put()
method on the note object.
Retrieving user data
To retrieve user data associated with a particular user ID, use the NDB
query() method to search the database for notes in the same entity group.
Entities in the same group, or
ancestor path,
share a common key name, which in this case is the user ID.
You can then fetch the query data and display the notes in the client:
Deploying your app
You have successfully integrated Firebase Authentication with your App Engine application. To see your application running in a live production environment:
- Change the backend host URL in
main.jstohttps://backend-dot-[PROJECT_ID].appspot.com. Replace[PROJECT_ID]with your project ID. Deploy the application using the Cloud SDK command-line interface:
gcloud app deploy backend/index.yaml frontend/app.yaml backend/app.yamlView the application live at
https://[PROJECT_ID].appspot.com.
Cleaning up
To avoid incurring charges to your GCP account for the resources used in this tutorial, delete your App Engine project:
Deleting the project
The easiest way to eliminate billing is to delete the project that you created for the tutorial.
To delete the project:
- In the GCP Console, go to the Projects page.
- In the project list, select the project you want to delete and click Delete delete.
- In the dialog, type the project ID, and then click Shut down to delete the project.
What's next
Try out other Google Cloud Platform features for yourself. Have a look at our tutorials.

